
Step 1 - Create the Document
Open a new Illustrator document 11 inches by 8.5 inches in CMYK color mode. This probably isn’t your default setting so make sure to change the Units and Color Mode for this one.
Select the Rectangle Tool (M), with no fill and .25pt stroke, then click once on the stage and enter 4in wide by 3.5in high. Select Ellipse Tool (L), click once on the stage and enter 2.1in by 2.2in. Select both the ellipse and the square, and in the Align palette center the objects horizontally and vertically.

Step 2 - Make Crop Marks
Select the square, and in the Menu go Filter > Create > Crop Marks. Increase the square size to 4.125in by 3.875in. This square will be the size of our image, which is 1/8in larger than the crop marks. This ensures no white-space when you or the printers cut these labels out.

Step 3 - Center the Label
Select all, and in the Align palette toggle the artboard and center the label horizontally and vertically. Select the square and crop marks and in the Menu select Object > Lock > Selection (Command + 2).

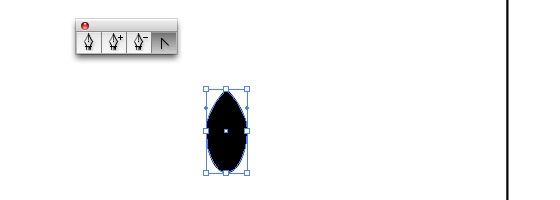
Step 4 - Create the Oval
Ok now we can start really making graphics. First off, select the ellipse and copy it (don’t paste it quite yet). Fill the oval with dark green (#6B752A). Give the oval an inside light green (#D3E27E) 3pt stroke. Use the Appearance palette to add an outside dark green (#6B752A) 1.5pt. stroke.

Step 5 - Cut Out the Center
Go ahead and paste in front your copied ellipse (Command + F). Double-click the Scale Tool to bring up the dialogue, and enter 65% in the Uniform field. Select both ellipses and in the Pathfinder palette, then apply Subtract From Shape Area an then click Expand.


Step 6 - Create the Brand Name Text
You should still have your original oval in the clipboard, so paste the ellipse in front again (Command + F). Double-click the scale Tool to bring up the dialogue, and this time enter 71% in the Uniform field. Select the Type On A Path Tool and choose a font (I used Copperplate bold at 34pt) and set the color to white. The Copperplate font-family is available at MyFonts.com. Click on the oval and type the brand name of the product.


Adjust tracking (space between the letters), if necessary, by clicking between the letters and pressing (Command + Shift + Left or Right Bracket keys). >Adjust the baseline, if necessary, by increasing or decreasing the size of the ellipse that the text is on.
Step 7 - Rotate the Text
View the rulers by pressing (Command + R) or Menu > View > Show Rulers, select the type and drag a horizontal guide from the top ruler to the center of the circle. If the guide isn’t visible, then go to Menu > View > Show Guides (Command + Semicolon). Use the Selection Tool (V) to drag the handle of the text to the centered position.

Step 8 - Add a Background to the Oval
Select the Ellipse Tool, click and hold Alt + Shift while dragging outward from the center of your oval to create a circle that extends past the empty center of the oval. Fill it with orange (#DF771C) and no stroke. Right-click > Arrange > Send to Back (Command + Alt + Left Bracket key) to send the orange circle to the back.

Step 9 - Create the Main Banner Strip
Select the rectangle Tool (M) and click once on the stage. Enter 2.2in and 0.3in for width and height. With the rectangle selected, go to the Gradient palette and choose a horizontal linear gradient color #533930 on each end and #A6583F in the middle. Give the rectangle a 1pt black stroke, and check the Round Join option.

Step 10 - Squeeze It!
In the Menu, go to Object > Envelope Distort > Make With Warp and choose Squeeze, check Horizontal, and Bend only 2%.

Step 11 - Create the Banner Text
Type the name of the product and center it in the rectangle (I’ll stick with Copperplate for all the text).

Step 12 - Create the Banner Tail Part 1
Select the Rectangle Tool (M) and click once on the stage, enter .5in width and .3in height. Give it a 1pt black stroke, using the Round Join option again. Give this rectangle a linear gradient with #533930 on the left and #DF771C on the right.

Step 13 - Create the Banner Tail Part 2
With the rectangle selected in the menu go to Object > Path > Add Anchor Points. With the Direct Selection Tool (A) select the middle point on the right of the rectangle, and drag it towards the center to create the end of the tail. Hold Shift while dragging to force it to be straight.

Step 14 - Position and Duplicate the Tail
Place this tail object on the right end of the rectangle, and nudge it down a bit. Send it behind the rectangle with a right-click > Arrange > Send Backward (Command + Left Bracket key). Copy the tail object and paste in front (Command + F). Right-click the copied tail object and select Transform > Reflect. Choose vertical and 90 degrees for the angle. Move the reflected tail object over to the left side, holding Shift while dragging to force it to be straight.


Step 15 - Create Banner Details
Now, a detail to make the banner more realistic: zoom in close to where the right tail meets the rectangle. Choose the Pen Tool(P) and draw a shape with four clicks: the bottom right of the rectangle, the bottom left of the tail, straight up to any position (hold Shift) and back to the beginning point to close.
Fill the shape with a dark brown (#2D1C17) and 1pt rounded black stroke. Press Command + Left Bracket key until the shape is behind the rectangle but in front of the tail.


Copy it, paste in front (Command + F), Right-click > Transform > Reflect > choose Vertical 90 degrees. Shift-drag to the same spot on the left end of the banner.

Step 16 - Warp the Banner
Select the entire banner and in the menu go to Object > Envelope Distort > Make With Warp, choosing Arc and 12% for the Bend.

Step 17 - Position the Banner
Now let’s place the banner in the design. Click the brand name text (“VECTOR TUTS”) so the center point is visible. Drag a vertical guide from the left ruler to the center point. >Place the banner in position, using the vertical guide to keep it centered.

Step 18 - Create a Wheat Grain
We could just grab an image of wheat or a stock vector, but would you learn much? Nope! Let’s make stalks of wheat from scratch. Use the Ellipse Tool (L) and create a small thin vertical oval of any color.
Use the Convert Anchor Point Tool (which is nested in the Pen Tool) and click the top point of the oval. Use the Selection Tool (V) and press Alt while dragging to create a copy of this tear drop shape to use as the tip of the wheat in a few steps. Place it aside for now.
Use the Direct Selection(A) Tool and drag the top point up and to the left on our original tear drop shape. With the Direct Selection Tool, drag the left side curve handle to the right, which curves the tear drop shape. Now it looks more like a grain of wheat.

Double-click the Rotate Tool (R) and choose an angle of about -20 degrees. You want to get that tip pointing slightly right of vertical.

Step 19 - Transform the Wheat Grain
From the Menu, select Effect > Distort & Transform > Transform. This is a great feature of Illustrator. You can use it to create all kinds of interesting patterns and shapes. In this case, we will repeat the wheat grain to make the rest of the wheat stalk. Check Preview and enter 3 for copies and -0.15 (about) for more vertical. Click OK when it looks right.

Step 20 - Copy and Position on the Left Side
Copy it, paste in front (Command + F), then right-click > Transform > Reflect, and choose Vertical 90 degrees. Nudge it left into position. Place your copied tear drop on the tip.

Use the Line Segment Tool(\) and create a white vertical line for the stem, below the grains.
Step 21 - Warp the Wheat
Select all the wheat elements and make them white. From the menu select Object > Envelope Distort > Make with Warp, and choose Arc for the style, check Vertical, and about a 30% Bend.

Step 22 - Position the Wheat in the Label
Place the wheat in the label, resizing and rotating as necessary, then go to Arrange > Send Backward (Command + Left Bracket key) to send it behind the banner. Copy and paste in front (Command + F), right-click and Transform > Reflect, choose Vertical 90 degrees and move the copy to the right side of the label.

Step 23 - Add Text to the Bottom
Add the word “Ale” or “Root Beer” or whatever the type of drink it is. In the Menu, go to Object > Envelope Distort > Make with Warp and enter an acceptable negative number under the Arch effect. Position the text in the middle-bottom of the label.

Step 24 - Add Text to the Top
Select and copy the main large text-on-a-path. Paste in front (Command + F). Increase the size so the circle is just larger than the label oval. Use the Selection Tool (V), and click any corner of the text-on-a-path and Alt + Shift-drag to expand equally.
Type a catch-phrase or quote to personalize the product. Decrease the font size as necessary and use the color #6B752A. Use the Selection Tool (V) to adjust the position of the text on the curve, by dragging the right handle.

Step 25 - Grab a Photo
Get a photo of the Brewmaster, or any person you’d like to feature on the label. It’s the head and shoulders we’re looking for. It is very helpful to have the subject on a white background. Many thanks to wookiestock atdeviantart.com for this photo I have used in this tutorial. Open the photo in Adobe Photoshop.

Step 26 - Prepare the Photo
In the Photoshop Menu go to Image > Adjustments > Threshold and adjust the slider until there’s a good balance of light and dark in the face. We will need the face area to be contained, as in no breaks along the perimeter of the head, because we will fill the face in with white later. So for this image, I darkened his left cheek and right ear so there is a complete outline of his head after the Threshold is applied.

Use the Elliptical Marquee Tool (M) to create a selection around the head and shoulders. Go to Select > Inverse (Command + Shift + I) and delete everything but the head and shoulders. Crop and save the photo.

Step 27 - Live Trace!
Open your new face photo in Illustrator. Select the image and click Live Trace, adjusting the settings as needed.


Step 28 - Live Paint!
Click Live Paint, then with the Live Paint Bucket Tool (K), fill all the black areas with dark brown (#533930). Fill all the face portions with white, using the Live Paint Bucket Tool. Clean up the image as necessary and place it in the middle of the label.

Step 29 - Add Depth to the Face
Now we want the top of the head to pop out from the oval, but the rest to go behind the oval, making a 3-D effect. Select the face, copy (Command + V), and paste in front (Command + F). Right click and select ungroup (Command + Shift + G.)

In the Pathfinder palette, choose Add To Shape Area and click Expand to make the face one solid shape.

Use the Knife Tool to chop off the top of the head, and delete the rest by using the Direct Selection Tool (A). The Knife Tool is one I hardly ever use, and there’s no shortcut for it, so it may be tricky to find. It is hidden under the Eraser Tool (Shift + E)

Select the face and send it back behind the oval. The chopped-off head part will be in front now.
Wow this thing is really starting to shape up! All we need now is a background and the label is finished!

Step 30 - Hook Up the Color and Lines
Select the label square and fill with light green (#D3E27E), and remove the stroke. Use the Line Tool to create two horizontal .25pt black lines; one near the top and one near the bottom. Feel free to make them longer than the square, as we will crop them later.

Step 31 - Blend the Lines
The Blend Tool makes it easy to repeat evenly these lines across the background. Select them both and in the Menu go to Object > Blend > Blend Options and choose 50 for Specified Steps and click OK. Now go to Object > Blend > Make to apply the effect. Send the lines behind the artwork but keep them in front of the green background.


Step 32 - Fade the Lines in the Center
Another really cool feature in Illustrator is the Opacity Mask. I will use it here to fade out the lines. Copy the green square and paste it in front of the lines, and give it a radial black and white gradient, with black in the center.

Select the square and the lines, and in the Transparency palette menu, choose Make Opacity Mask.

Adjust the gradient to fade the lines out in the center. Your label design is done!

Make sure to click the left square in the Transparency palette when you are finished editing the opacity mask, because you will not be able to select other elements until you do.

Step 33 - Flatten Transparency
Some printers freak out when they see transparency-related effects, so we will flatten ours to be safe. Select the opacity mask and choose Object > Flatten Transparency.

Step 34 - Create Outlines
Select all the text in this file (or just select all (Command + A), and in the Menu choose Type > Create Outlines. This will ensure your typography is preserved. It may be a good idea to save your file before this step, in case you want to edit the text later.
Step 35 - Arrange Two Labels on the Artboard
Select everything including the crop marks and group it (Command + G). Change the x-position to 3in. Copy and paste another label in front (Command + F). Move the x-position of the second label to 8in.
Ungroup the objects until you can select and delete the horizontal crop marks in the middle of the two labels. Here is your final, printer-friendly, super tasty illustration!

Thanks for following along, and I really hope your labels are a big hit!

Here is the original label I made for “Huja Brew.”


0 comments:
Post a Comment