Step 1
The first step is to create a background for our image. This time we’ll use a simple combination of different textures using the blending modes. Just open the
first texture and the
second one over the first. Now change the mode of this last one to Multiply and the Opacity to about 40%, then Merge them.
Step 2
Now duplicate your layer, Desaturate the upper one and use the Eraser Tool (E) to delete parts from the upper left zone. Use the Motion Blur in this layer like in the sample image below, merge the layers, and finally add some magenta and blue using Image > Adjustments > Color Balance.
Step 3
Now grab this
image of a woman. Cut her out from the original picture and paste in the center of the new image. We are going to modify her color and light using the blending modes again.
From the beginning we have in mind that we want the light falling from the upper-left corner of the image, so we have to show this in the girl and her lights and shadows. First, let’s go to Image > Adjustments > Hue/Saturation and add some more saturation to the image.
Now duplicate our layer with the girl, and with the upper layer selected go to Image > Adjustments > Brightness/Contrast and add more brightness. Change the mode of this layer to Screen and the Opacity to 58%. Finally, you can delete (using a blurred brush and a Layer Mask or the Eraser Tool) the darker parts (under her arms and hair).
Duplicate our first layer with the girl again and move it over the other. Go to Image > Adjustments > Levels and make it darker. Pay attention to the shadows in her dress, don’t be worried by her face or others zones at this point.
When you have some good details in the shadows of the dress change the Layer Mode to Linear Burn and use the Layer Mask or the Eraser Tool again to delete the zones that you don’t need to be dark, like her face, the light zones in her arms, etc. Now merge the Layers of the girl.
Finally, use the Burn Tool (O) to make the zones darker than you need. I retouched her hair and some details in her face.
Step 4
The face in our image doesn’t look too big, but it still seems a little pixelated, we can fix this using the Smudge Tool (R). Select it with a small brush (about 16 px) and the strength set to about 30%, and use it on her skin with small strokes in the direction of her features. You can use the Blur Tool (R) to help with this process, but use it carefully because we don’t want the face out of focus.
Step 5
Now let’s duplicate our girl layer and add some Cyan, Green and Blue to the lower one. Go to Image > Adjustments > Color Balance and change the settings to those shown below.
Change the Layer Mode in the one on the top to Hard Light, the Opacity to 40% and use the Layer Mask or the Eraser Tool to delete most of the image, just leave some of its warm tones on the left side, where the light is falling over our model. Merge the layers with the girl and finally go to Image > Brightness/Contrast and add a little more of brightness.
Step 6
We’re going to create the shadow of the girl in the easiest way. Just create a new layer over the girl and use the Brush Tool (B) with black selected to draw some uneven horizontal lines under her feet and her back.
Go to Filter > Blur > Motion Blur and use a horizontal blur with about 760 px. If you need some more shadows over the girl just supplicate the layer, erase the shadows that you don’t need, and merge the layers.
Now let’s add a transparent shadow falling over the background. Just duplicate the “girl” layer, fill it with black (for example, go to Levels and make it dark) and move it to the position shown below. Then make it a little smaller using Free Transform (Command + T) and add a Gaussian Blur (Filters > Blur > Gaussian Blur) of about 21 px.
Change the Layer Mode of the shadow to Soft Light, the Opacity to 75%, and finally erase the lower part of the shadow.
Step 7
Now create a new layer, select the Brush Tool (B) again with black selected and a blurred blush, then draw some dark zones, as shown below.
Go to Filter > Motion Blur and add the settings shown below. You can use the filter twice or more if you prefer.
Change the Opacity to about 70%, erase some parts if you consider it necessary and change the Blending Mode to Multiply. If you want to add more shadows in some parts just repeat the process painting in other places.
Step 8
Now, in a new layer use a
smoke brush with a white color selected and put it behind the girl. You can use Gaussian Blur to make it out of focus.
Step 9
Now we’re going to create some subtle rays of light in the corner of our image. You can draw some lines and use the Motion Blur, but we can do it with the same brush that we´ve used for the smoke. Just duplicate some of these layers and apply the Motion Blur (Filters > Blur > Motion Blur) with the settings shown below.
Now move the layer to the corner and repeat the previous step with another brush. Use Free Transform (Command + T) to change the angle of the rays. I used three different layer for the light to get a good result.
Step 10
Now grab an
image with ribbons in it. Open the new image and select the ribbons, as shown below.
Copy and paste them into our image and go to Image > Adjustments > Hue/Saturation. Modify the settings as shown below.
Finally, use the Burn Tool (O) to make darker the zones in the ribbon that are not touched by light. You can adjust levels or other settings to get a perfect color and light.
Grab some more ribbons from
another similar image. Select them and paste them into our image, then change the color/saturation, and use the Burn Tool (O) in a similar way as in the previous step.
Add the shadow for this last ribbon falling over the girl’s dress. There are a lot of ways to make it. For example, draw a black stripe, use Gaussian Blur, change the opacity and the blending mode to Multiply, much like we did in previous steps.
For the shadow of the second ribbon, duplicate this layer, fill it with black and apply a Gaussian Blur.
Change the blending mode to Soft Light and erase the parts that you don’t need.
Finally, I add a
new ribbon and a new layer of shadow under the model.
Step 11
Now let’s add some
flower imagery. This is a simple cut and paste process. The only important thing is that you change the levels or colors little in the images as needed.
Use some stock images of flowers to add behind the girl. You can download these images:
1,
2, and
3.
The only remarkable details are some shadows added using the brush and some Gaussian Blur, then change the color in one of the images. To make this just go to Image > Adjustments > Hue/Saturation, select yellow colors, and change the Hue bar as shown.
Add a
flower image in the hand of the girl. To integrate it in the image select the layer of the flower and draw a black shadow in the upper part, then use the Gaussian Blur again (Filters > Blur > Gaussian Blur). Now change the opacity of the layer if it’s needs. Create a new layer under the flower and paint two little shadows, use blur again using a subtle Gaussian Blur, and change the opacity as needed.
The system to add the other flowers are always the same. It’s easy and it only requires that you choose good stock images. For example, it’s important that the light in the flowers is logical and respects the light source of our image. If light come from left, don’t use images with the shadow in the right. It’s really simple, you just need cut them, and correct them a little with Levels as needed.
Step 12
Now let’s add some rays of lights flowing from the hand of the girl. To make this, select the Brush Tool, select a hard brush with a size about 8 px and white as the foreground color. Now select the Pen Tool (P) and select in the upper part the option of Paths.
Now draw a curve similar to the one in the image and press the right button on your mouse, then select Stroke Path. In this new menu select Brush and check the Simulate Pressure box.
Press OK. Now press the red button on your mouse again, and select Delete Path. In this layer, select Layer > Layer Style > Gradient Overlay. Add a gradient from black to blue as shown below. Then select Outer Glow and add a blue glow.
Now add a Gaussian Blur to the layer. Go to Filter > Blur > Gaussian Blur and add 2,5 px.
Now duplicate the layer and change the position of the new one.
Select the Brush Tool again and use the smoke brush with a white color. Draw some of smoke and select Edit > Transform > Warp to adjust the curve of the smoke as needed.
For the other ray of light I’ve used the same steps as those above.
Step 13
Now create a new layer, use a brush with a white color to draw a stripe, and then use a blur on it. Finally, change the blending mode of this layer to Overlay. Then you can move it over the ribbons to simulate shine.
For the rays behind the girl use the same system. After you’ve created one of them, duplicate it and move until you’ve done something similar to the sample below. Finally, add the smoke as you’ve done previously.
With these simple ideas I’ve created different points of lights marked in red in the next below. With a mark in blue you can see another ray of light that I’ve drawn using the previous steps.
Step 14
Now that we’re finishing the image, we just need to add details to make it more attractive.
For example, let’s use
some petals to decorate the image here and there. Use
some flowers too and put them in our image as if they’re flying. To make the movement effect just go to Filter > Blur > Gaussian Blur.
Cut another
ribbon, paste it in the right corner of our image and add a Motion Blur. Then go to Layer > New Adjustments Layer > Drop Shadow and add the setting shown below.
Add another
ribbon in the bottom of the image and repeat the Motion Blur.
Step 15
Finally, let’s add some Adjustments Layers. Go to your upper layer and then to Layer > New Adjustments Layer > Levels. Modify the settings as shown and repeat the process with Color Balance and a Gradient Map. Then change the opacity in the Gradient Map layer to 9% and in the Levels layer to 75%.
Conclusion
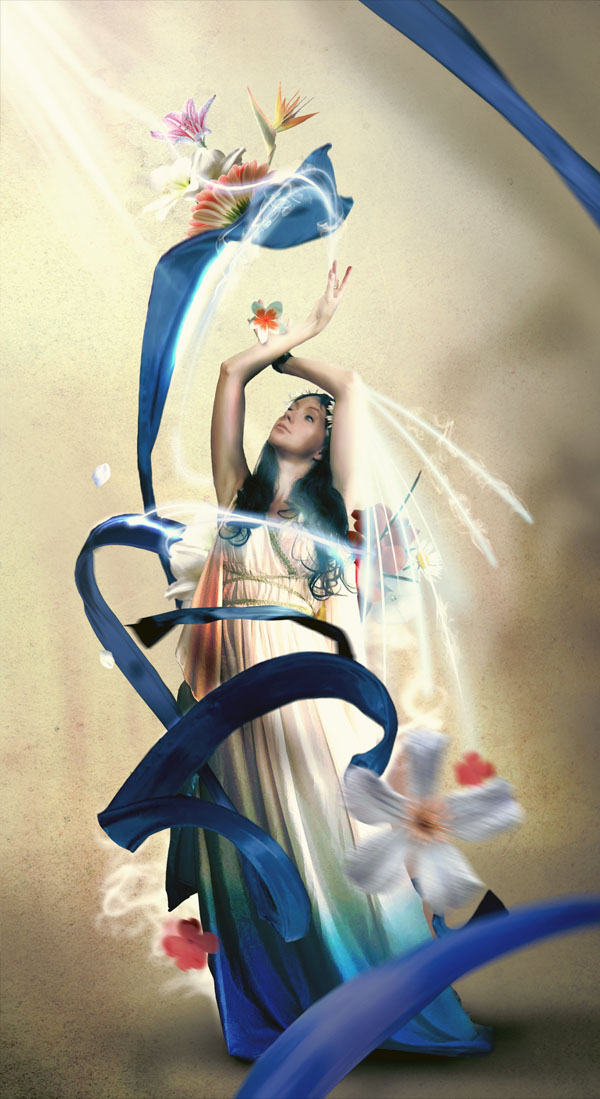
The final image is below and I hope you enjoyed this tutorial! Have fun applying these techniques in your own work!