Showing posts with label Macintosh. Show all posts

Installing Macintosh in PC using Iatkos S3 V2

What you need:


1. Iboot


2.Iatkos S3 V2


You Must Do:

1.Burn dvd with Transmac Only


2.Burn Dvd with Lowest Speed 


(1x,2x,4x)

Installation Process:

1.  Burn Iboot into the Cd

2. Burn iatkos into Dvd (as abow)

3. Insert iboot cd & restart your pc

4. Enter into BIOS settings ( By pressing F2 for most devices)

5. Change the first boot priority to CD/DVD & second boot priority to Harddisk

6. Press F10 and Save settings & Reboot your PC

7. You will get screen something like this below : 


8. Remove iboot CD and insert Iatkos Dvd into Drive

9. After Inserting DVD press F5  to refresh

10. you will get Iatkos S3 V2 disk same as like above iboot picture....

11. select iatkos s3 v2 and type " -v " (without quotes)

12. Press Enter

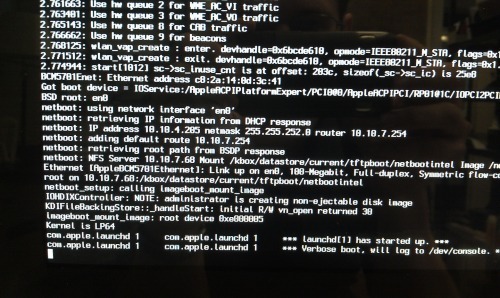
13. It takes several minutes to load...like this: (if any errors noticed in screen...leave it )


14. after completing above process you can get screen like below :


15. choose Preferred  language.... click next...you will get like this...

16. next you get agreement screen, click next..you'll get like below : 
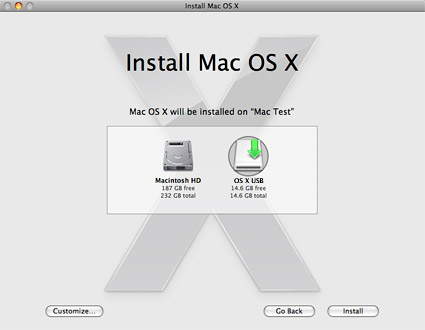
17. here we go the important steps from here..if you get something like below:
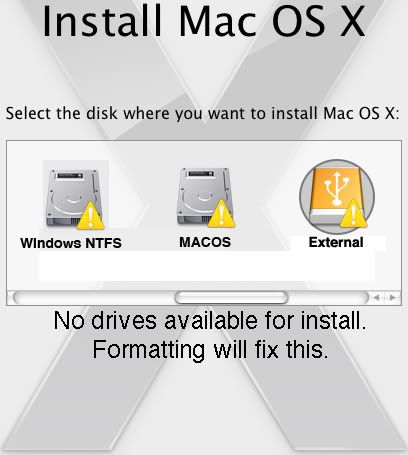


18. Do this......click on "Utilities" menu & select "disk utilities"..you will get like this : do as like below

Note: All the data in the hard disk will be erased.... So that Only select the partition on left side then do like below select .....
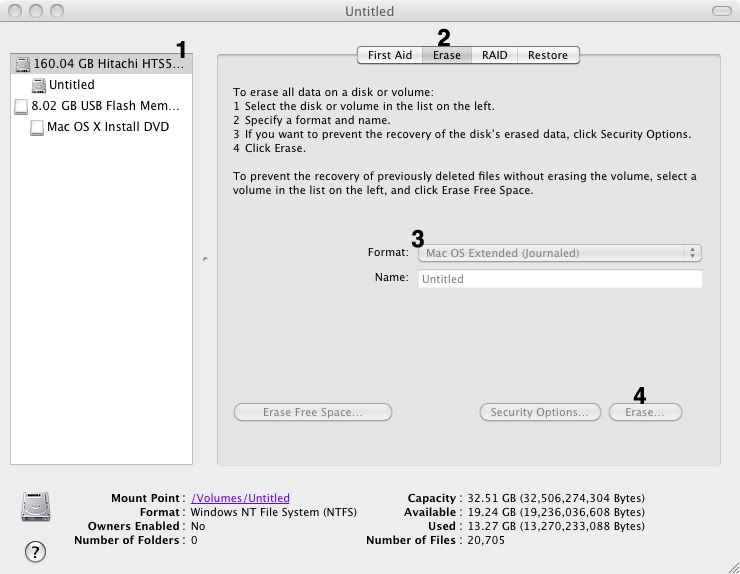


19. you will get like this now :
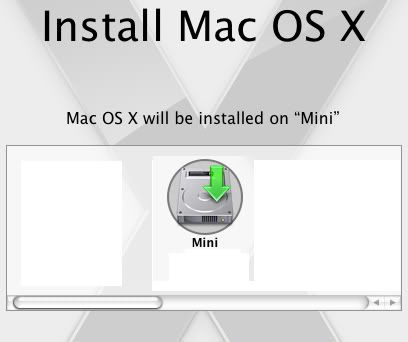

20.  Here another important step is "Customize" Options.....

21. click Customize you will get like below : 

22.  Select As same as below for Clean installation 


                                                You can select some other options at your risk

22. Click "Install".....it will take several minutes to complete.... wait until you get like this...


23. Restart your system you will get intro video ...

24. That's It you have Installed Macintosh on Your Loving PC...

25. You may get some errors....post a comment... any Error can solvable....Thank You
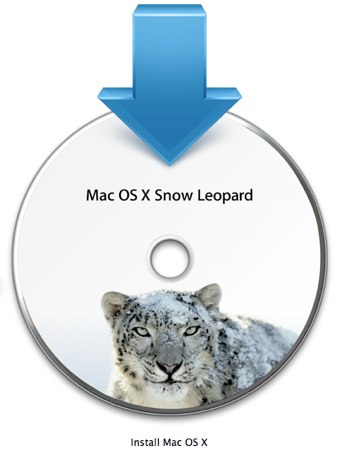


iATKOS S3 Snow Leopard 10.6.3 Intel DVD


                                                         >>>> iATKOS S3 download <<<<

md5 of iATKOS_S3.zip >>>
md5 of iATKOS_S3.iso >>> c06f2dab58f128badf4382eb428f721a

This download includes iATKOS_S3.zip file. After extracting the zip package you will have 2 files which is the iATKOS S3 ISO DVD image and the info.txt file. Burn the ISO image to a blank DVD (±R ,±RW) and then you are ready to boot iATKOS S3 DVD.

Windowsers can easily extract zip package and burn iso to dvd using Windows' built-in system tools (double click to zip file, extract the iso, right click to iso and select burn) but of course 3rd party tools can also be used for these actions. ie. winrar for extracting the zip, nero for burning the iso etc.

Mac users, you can extract the zip package and burn the iso to dvd using built-in system tools. Just double click to zip and burn it using Disk Utility. We advice to use built-in extractor by just double clicking on zip, 3rd party tools for extraction may change the file permissions after extraction, if so right click and lock the iso file by file info to preserve md5 before mounting it.

Linux users: ie. Ark, unzip etc. to extract iso, then k3b, cdrecord etc. to burn it..

Install Mac OS X on any Intel-based PC


Any OSx86 installation guide can seem daunting at first glance, especially when trying to remember cryptic terminal commands and sorting through volumes of misinformation on the web.  This guide requires no coding, terminal work, or Mac experience of any kind.  You will not need access to a Mac.  In fact, it's easier and faster for me to install Snow Leopard with fully working components on my system than it is to install Windows 7.  And more fun.

The iBoot + MultiBeast method is designed and tested for any desktop or laptop running the latest line of Intel processors, the Core i3/i5/i7s.  I have had reports of success with older machines as well including CoreDuo, Core2Duo, and even Pentium 4.  However, AMD processors are not supported.

YOU WILL NEED

  • A computer running an Intel Processor
  • A blank CD
  • Mac OS X Snow Leopard Retail DVD
  • To leave any fear of your computer at the door.
  • Patience and humility- it may not work out perfectly the first time- but with enough tenacity and grit, you'll reach the promised land.  It's easy to get frustrated, but don't give up!  There are a community of users with similar hardware in the tonymacx86 Forum to provide support if you get stuck.
BEFORE YOU BEGIN
  • If you have greater than 4gb of RAM, remove the extra RAM for a maximum of 4gb.  You can put back any extra RAM in after the installation process.
  • Use only 1 graphics card in the 1st PCIe slot with 1 monitor plugged in.
  • Remove any hard drives besides the blank drive being used for OS X.
  • Remove any USB peripherals besides keyboard and mouse.
  • Remove any PCI cards besides graphics- they may not be Mac compatible.
  • If using a Gigabyte 1156 board, use the blue Intel SATA ports- not the white Gigabyte SATA ports.
  • It's best to use an empty hard drive- you will have to partition and format the drive. 
  • Always back up any of your important data.
STEP 1: BIOS SETTINGS
You will need to set your BIOS to ACHI mode and your Boot Priority to boot from CD-ROM first.  This is the most important step, and one many people overlook.  Make sure your bios settings match these.  It's not difficult- the only thing I did on my Gigabyte board besides setting Boot Priority to CD/DVD first was set Optimized Defaults, change SATA to AHCI mode, and set HPET to 64-bit mode.

STEP 2: INSTALL MAC OS X 

In order to boot the Mac OS X Retail DVD, you'll need to download and burn iBoot.  For desktops and laptops using unsupported Intel CPUs and graphics, a legacy version of iBoot can be downloaded here.
  1. Download iBoot
  2. Burn the image to CD
  3. Place iBoot in CD/DVD drive
  4. Restart computer
  5. At boot prompt, eject iBoot


  6. Insert your Mac OS X Snow Leopard Retail DVD and press F5
  7. When you see the screen below, press enter to begin the boot process
  8. When you get to the installation screen, open Utilities/Disk Utility.  NOTE: If you cannot get to the installation screen, retry from Step 4, type PCIRootUID=1 before hitting enter. If that doesn't work then try PCIRootUID=1 -x or just -x which will enter Mac OS X Safe Mode and will allow you to proceed. For some graphics cards, use GraphicsEnabler=No boot flag to proceed. 
  9. Partition your hard drive to GUID Partition Table
  10. Format your hard drive to Mac OS Extended (Journaled).   NOTE: The bootloader can only boot from a disk or partition of 1 TB or less.  Partition larger drives.
  11. For the purposes of this guide, name it Snow Leopard.  You can rename it later.
  12. Close Disk Utility
  13. When the installer asks you where to install, choose Snow Leopard
  14. Choose Customize‚ and uncheck additional options.  This will hasten the install process.  You can always install this stuff later.
  15. Restart computer.
  16. Place iBoot back in drive.
  17. When you get to the boot selection screen, choose your new Snow Leopard installation.
  18. View the super-cool Mac OS X Snow Leopard Welcome Video, and set up your computer!

STEP 3: UPDATE TO 10.6.8
If you have a Sandy Bridge system, please follow these specialized instructions to update to 10.6.8.
  1. Open Finder and navigate to your Snow Leopard drive.
  2. Download the Mac OS X 10.6.8 Combo Update
  3. Download MultiBeast
  4. Open MultiBeast- don't run it yet, just leave it open.  Set up windows as shown.
  5. Mount MacOSXUpdCombo10.6.8.dmg
  6. Install MacOSXUpdCombo10.6.8.pkg
  7. Upon completion, the installer will ask you to reboot.  DO NOT REBOOT.
  8. Switch to the already open MultiBeast.  If it closes, just re-open it.
STEP 4: MULTIBEAST
MultiBeast is an all-in-one post-installation tool designed to enable boot from hard drive, and install support for Audio, Network, and Graphics. It contains two different complete post-installation solutions: EasyBeast and UserDSDT.  In addition it includes System Utilities to rebuild caches and repair permissions and a collection of drivers, boot loaders, boot time config files and handy software.

Choose one of the following options directly following a fresh installation and update:   

EasyBeast is a DSDT-free solution for any Core/Core2/Core i system. It installs all of the essentials to allow your system to boot from the hard drive. Audio, Graphics and Network will have to be enabled separately.  

UserDSDT is a bare-minimum solution for those who have their own pre-edited DSDT. Place your DSDT.aml on the desktop before install. Audio, Graphics and Network will have to be enabled separately.  HINT: Check the DSDT Database for a pre-edited DSDT. 
  1. Run MultiBeast.
  2. If you have a custom DSDT that's been edited, place the file on your desktop and choose UserDSDT.
  3. All others select EasyBeast 
  4. Select System Utilities.
  5. Optionally, you may install further drivers via Advanced Options to enable ethernet, sound, graphics, etc...  Be sure to read the documentation provided about each installation option.  NOTE: EasyBeast, and UserDSDT install the bootloader by default, so you'll not need to check that option.     
  6. Install to Snow Leopard- it should take about 4 minutes to run scripts.
  7. Eject iBoot.
  8. Reboot- from your new Snow Leopard installation drive.

Congratulations!  You're done!!

Your PC is now fully operational, while running the latest version of Mac OS X Snow Leopard!  And you have a nice Boot CD to get into your system in case things go awry.  Boot your system from iBoot if you have issues.  You may run MultiBeast as often as you like.

If you can't boot, try typing -x at the boot prompt to enter safe mode, or just boot with iBoot.  When you get to the desktop, you can make all of the changes you need to.  The best way to start fresh is delete whatever you're trying to get rid of- including the whole /Extra folder, as most kexts are installed there.  Then you can re-run MultiBeast.  As long as you rebuild caches and repair permissions after you're done, you can do just about anything you want to /Extra/Extensions and /System/Library/Extensions.  Anything can be tweaked and enabled upon subsequent uses of MultiBeast.

If you've had success using iBoot + MultiBeast, consider a contribution to help keep the sites going.  We're constantly updating and tweaking our tools to help you.

Thanks in advance! 

-tonymacx86 & MacMan
For our most current workarounds and solutions for issues such as USB and audio, check out the Mac OS X 10.6.3 Update Mac OS X 10.6.4 Update,  Mac OS X 10.6.5 UpdateMac OS X 10.6.6 UpdateMac OS X 10.6.7 Update, and Mac OS X 10.6.8 Update articles. Good luck, and see you on the forum!

Related Posts Plugin for WordPress, Blogger...